Monday, 30 December 2013

create a new package in android

hi guys today i am going to tell you how you can create a new package in android and resole the reference error in that package. we create a new package to keep over project in a organised manner so that if we want to change anything afterwords we don't have to search in the whole project. so lets start..... 

First step
right click on the src directory of your project and click on new package 


Second step
enter the package name like com.xxxx.xxx.xxx and click ok


Third step
now your new package will be created and now you have to create a new class file in that package


Fourth step
after doing this extend your class with activity and create oncreate function in that set the content view to any of the layout file. 

Fifth step

now save it you will see that the there is an error on R.layout.activity_main to remove this error remove the import android.R; 

and add 

import com.your.mainpackage.name.*;

or if it still shows the error create chage the above import statement to 

import com.your.mainpackage.name.R;


Thursday, 26 December 2013

Splash screen in android application

Today In this tutorial i am going to explain you how we can add a splash screen to our android application. Splash screen is basically a screen which comes for few seconds when we opens a application. this makes our app more impressive because we can put a image of our origination. So lets start ......

First Step:- Create a layout in which you have to add a background image to the layout like this.

<?xml version="1.0" encoding="utf-8"?>
<LinearLayout xmlns:android="http://schemas.android.com/apk/res/android"
    android:layout_width="match_parent"
    android:layout_height="match_parent"
    android:background="@drawable/splesh_screen"
    android:orientation="vertical" >

</LinearLayout>

Second Step:- Now its time to write some coding. In the java file you have to create a thread and make the thread sleep as per your convince.Put the code in oncreate method 

the code will be......

        
        Thread timer = new Thread(){
            public void run(){
                try{
                    sleep(5000);
                }catch (InterruptedException e){
                    e.printStackTrace();
                }finally {
                    Intent wp = new Intent(splash.this,MainActivity.class);
                    startActivity(wp);
                }
            }
        };
        timer.start();
   

Snapshots:-


https://adf.ly/bF8NK Click here to Download the project :-

Sunday, 22 December 2013

how to Implement two spinners in one activity in android

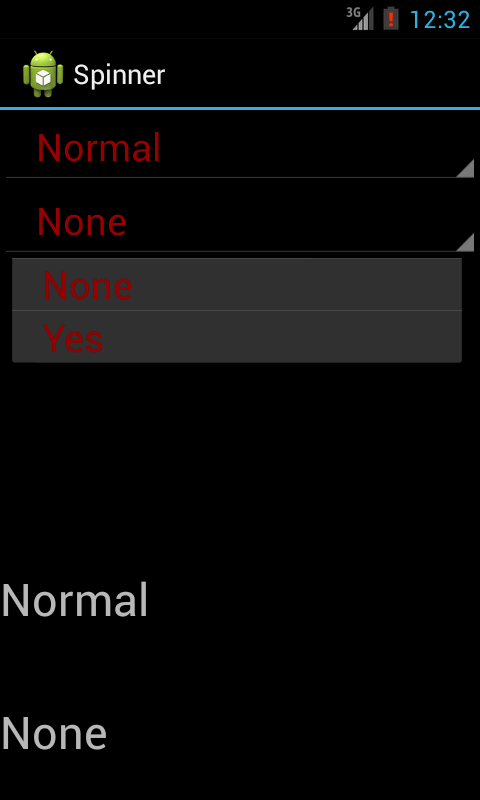
Today i am going to explain you how to implement two spinners in one activity. many of the android application developers gets a situation in which they have to implement two spinners on one module. generally they are required when you want to take a query from the user. By the use of the spinner you can make your application more attractive and it is also very user friendly because user can choose the option from that he don't have to write anything.

So lets start -

First steps : - create a drawable folder in the res directory and create a XML file in it lets say row.XML
                    like this ....

<?xml version="1.0" encoding="utf-8"?>
<LinearLayout xmlns:android="http://schemas.android.com/apk/res/android"
android:layout_width="fill_parent"
android:layout_height="wrap_content"
android:orientation="horizontal"
>

<TextView
    android:id="@+id/value"
    android:layout_width="wrap_content"
    android:layout_height="wrap_content"
    android:paddingLeft="20dp"
    android:text="Interested in"
    android:textColor="#990000"
    android:textColorLink="#990000"
    android:textSize="25sp" />

</LinearLayout>

Step Two:- Go to your layout folder and add two spinners in that and two text view. we are taking text view to show the value which is selected by the user.

Main XML Code:-

<RelativeLayout xmlns:android="http://schemas.android.com/apk/res/android"
    xmlns:tools="http://schemas.android.com/tools"
    android:id="@+id/RelativeLayout1"
    android:layout_width="match_parent"
    android:layout_height="match_parent"
    android:orientation="vertical"
    tools:context=".MainActivity" >

    <Spinner
        android:id="@+id/spinner2"
        android:layout_width="wrap_content"
        android:layout_height="wrap_content"
        android:layout_alignParentLeft="true"
        android:layout_below="@+id/spinner1" />

    <Spinner
        android:id="@+id/spinner1"
        android:layout_width="wrap_content"
        android:layout_height="wrap_content"
        android:layout_alignParentLeft="true"
        android:layout_alignParentTop="true" />

    <Button
        android:id="@+id/result"
        android:layout_width="wrap_content"
        android:layout_height="wrap_content"
        android:layout_centerHorizontal="true"
        android:layout_centerVertical="true"
        android:text="click"
        android:visibility="invisible" />

    <TextView
        android:id="@+id/textView1"
        android:layout_width="match_parent"
        android:layout_height="wrap_content"
        android:layout_alignParentLeft="true"
        android:layout_below="@+id/result"
        android:layout_marginTop="51dp" />

    <TextView
        android:id="@+id/textView2"
        android:layout_width="match_parent"
        android:layout_height="wrap_content"
        android:layout_alignParentLeft="true"
        android:layout_below="@+id/textView1"
        android:layout_marginTop="48dp" />

</RelativeLayout>

Step Three :- Now we will do some coding. first initialize the spinner after that  set an string arrayadapter to take the reference of row.XML file and a string array. after that set adapter on the spinner and adapter is your arrayadapter and at last set OnItemSelectedListener on the spiner. your code will be look like this.

        spinner1=(Spinner)findViewById(R.id.spinner1);
        ArrayAdapter<String> adapter = new ArrayAdapter<String>(this,
        R.drawable.row, R.id.value, Dinner);
        spinner1.setAdapter(adapter);
        spinner1.setOnItemSelectedListener(this);

Full Source Code :-

public class MainActivity extends Activity implements OnItemSelectedListener{

    Spinner spinner1,spinner2;
    String Dinner [] = {"Light","Normal","Heavy"};
    String inter [] = {"None","Yes"};
    String diner,option;
    Button result;
    TextView t1,t2;
    @Override
    protected void onCreate(Bundle savedInstanceState) {
        // TODO Auto-generated method stub
        super.onCreate(savedInstanceState);
        setContentView(R.layout.activity_main);
   
        result=(Button)findViewById(R.id.result);
        t1=(TextView)findViewById(R.id.textView1);
        t2=(TextView)findViewById(R.id.textView2);
               
        spinner1=(Spinner)findViewById(R.id.spinner1);
        ArrayAdapter<String> adapter = new ArrayAdapter<String>(this,
        R.drawable.row, R.id.value, Dinner);
        spinner1.setAdapter(adapter);
        spinner1.setOnItemSelectedListener(this);
       
        spinner2=(Spinner)findViewById(R.id.spinner2);
        ArrayAdapter<String> adapter1 = new ArrayAdapter<String>(this,
        R.drawable.row, R.id.value, inter);
        spinner2.setAdapter(adapter1);
        spinner2.setOnItemSelectedListener(this);
        /*
        result.setOnClickListener(new OnClickListener() {
           
            @Override
            public void onClick(View v) {
                // TODO Auto-generated method stub
                t1.setText(diner)
            }
        });
        */
    }

    @Override
    public void onItemSelected(AdapterView<?> arg0, View arg1, int arg2,
            long arg3) {
        // TODO Auto-generated method stub
        Spinner spin = (Spinner)arg0;
        Spinner spin2 = (Spinner)arg0;
       
        if(spin.getId() == R.id.spinner1)
        {
            diner=Dinner[arg2];
            t1.setText(diner.toString());
        }
        else if(spin2.getId() == R.id.spinner2)
        {
            option=inter[arg2];   
            t2.setText(option.toString());
        }
    }

    @Override
    public void onNothingSelected(AdapterView<?> arg0) {
        // TODO Auto-generated method stub
       
    }
}


snapshots:-


Click here to download the project:-


Friday, 20 December 2013

Rate us In Android Programmatically

In this tutorial i am going to explain a simple code By this code you can able to put a rate us button in your android application without going in any kind of browser. This code will directly take you to the play store and from there the user can rate your app. This is the great technique to increase your application status and by this your application ranking will also improve

The link which we will use is to taken from play store and then have to be split ed from the details and till the package name of your application please do not add and kind of more words like  this (&hl=en)
your link will looks like this "details?id=com.*******"

First create a button in the layout and name it as rate us (XML is shown below) :-

XML file :- 

<RelativeLayout xmlns:android="http://schemas.android.com/apk/res/android"
    xmlns:tools="http://schemas.android.com/tools"
    android:id="@+id/RelativeLayout1"
    android:layout_width="match_parent"
    android:layout_height="match_parent"
    android:orientation="vertical"
    tools:context=".MainActivity" >

    <Button
        android:id="@+id/rate"
        android:layout_width="wrap_content"
        android:layout_height="wrap_content"
        android:layout_centerHorizontal="true"
        android:layout_centerVertical="true"
        android:text="Rate Us" />

</RelativeLayout>


Second Step:-
In this step will set a on click listener on the button which we have added in our XML file and Intent code in that onclicklistener . Set the Action on intent to view  and put the sting of the market place in that setdata function of the intent. In the set data function set a URI.parse and put market link there and at last initiate the intent as startActivity.

Full Source Code:-

public class MainActivity extends Activity{

    Button rate;
   
    @Override
    protected void onCreate(Bundle savedInstanceState) {
        // TODO Auto-generated method stub
        super.onCreate(savedInstanceState);
        setContentView(R.layout.activity_main);
   
        rate=(Button)findViewById(R.id.rate);
        rate.setOnClickListener(new OnClickListener() {
           
            @Override
            public void onClick(View v) {
                // TODO Auto-generated method stub
                    Intent intent = new Intent(Intent.ACTION_VIEW);
                     intent.setData(Uri.parse
("market://details?id=com.hairtransplant.advanceinfotech.host4asia"));
                    startActivity(intent);
            }
        });
    }
}

snapshots:-


Click to Download the project:-

Tuesday, 17 December 2013

How to share Android Application programmatically.

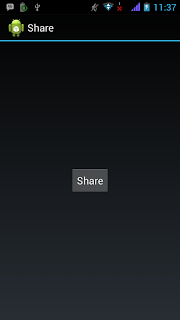
Today I will explain you how to create a share button in android application programmatically. In this application we will use the Intent to share the application and a String variable to which will store the link of your application of the play store. This purpose can be done by the Action send of Intent.

By this action a pop up will occur on the mobile screen and it that no of application will be shown which can send any kind of message to the other person just chose one of the application.
XML file required :-

<RelativeLayout xmlns:android="http://schemas.android.com/apk/res/android"
    xmlns:tools="http://schemas.android.com/tools"
    android:id="@+id/RelativeLayout1"
    android:layout_width="match_parent"
    android:layout_height="match_parent"
    android:orientation="vertical"
    tools:context=".MainActivity" >

    <Button
        android:id="@+id/share"
        android:layout_width="wrap_content"
        android:layout_height="wrap_content"
        android:layout_centerHorizontal="true"
        android:layout_centerVertical="true"
        android:text="Share" />

</RelativeLayout>

Source Code:-

First Step:-  Initialize the button in the oncreate method of the activity.

Button share=(Button)findViewById(R.id.share);

Second Step:- set on click listener on the button and put the following code in the listener in this code we will set intent as a action to send and use put extra method on intent to add the subject which is title of the application and text in which add the string variable which contain the link of the application of the playstore

String shareBody = "https://play.google.com/store/apps/details?id=************************";

                Intent sharingIntent = new Intent(android.content.Intent.ACTION_SEND);
                sharingIntent.setType("text/plain");
                sharingIntent.putExtra(android.content.Intent.EXTRA_SUBJECT, "APP NAME (Open it in Google Play Store to Download the Application)");

                sharingIntent.putExtra(android.content.Intent.EXTRA_TEXT, shareBody);
                startActivity(Intent.createChooser(sharingIntent, "Share via"));


Snapshots:-


Share Button Android Applicationshare Andorid application programmatically


Click here To Download The Project:-

Monday, 16 December 2013

How to implement Accordion In Android Or you can say changing VIsibility of the Layout

This is a simple tutorial in which you can find the use of setvisibility property of the layout. In this example i m showing you how to implement a accordion in android.

In this example you will notice that we you are clicking the heading of a subject the layout hidden in the XML will get appear this is done by setting the visibility of the layout GONE and VISIBLE. So lets Begin


XML FIle:-

In this XML you will notice that for the heading we have taken a TextView and for the description the TextView taken in inside the LinearLayout. And each of the layout is assigned a id. so we will initialize the layout in our source code and change the visibility according to our requirement.

<?xml version="1.0" encoding="utf-8"?>
<LinearLayout xmlns:android="http://schemas.android.com/apk/res/android"
    android:layout_width="match_parent"
    android:layout_height="match_parent"
    android:background="#FFFFFF"
    android:orientation="vertical"
     >

    <ScrollView
        android:id="@+id/scrollView1"
        android:layout_width="match_parent"
        android:layout_height="wrap_content" >

        <LinearLayout
            android:layout_width="match_parent"
            android:layout_height="match_parent"
            android:background="#FFFFFF"
            android:orientation="vertical" >

            <TextView
                android:id="@+id/layouttext1"
                android:layout_width="wrap_content"
                android:layout_height="wrap_content"
                android:text="IT DevelopersDelhi"
                android:textColor="#000000"
                android:textSize="20sp" />

            <LinearLayout
                android:id="@+id/layout1"
                android:layout_width="match_parent"
                android:layout_height="wrap_content"
                android:orientation="vertical" >

                <TextView
                    android:id="@+id/textView3"
                    android:layout_width="wrap_content"
                    android:layout_height="wrap_content"
                     android:textColor="#000000"
                    android:text="IT Developers Delhi is new and fast growing organization.We are commented towards our work and customer’s.Our main goal is to complete the project on time and on reasonable cost. Give it us a try and Leave your all worries on us .We are capable of doing all kind of technical work in the field of SEO, Web Designing and Android Apps Development. We use static and dynamic both kind of approaches in website development." />
            </LinearLayout>

            <TextView
                android:id="@+id/layouttext2"
                android:layout_width="wrap_content"
                android:layout_height="wrap_content"
                android:paddingTop="20dp"
                 android:textColor="#000000"
                android:text="SEO"
               
                android:textSize="20sp" />

            <LinearLayout
                android:id="@+id/layout2"
                android:layout_width="match_parent"
                android:layout_height="wrap_content"
                android:orientation="vertical" >

                <TextView
                    android:id="@+id/textView4"
                    android:layout_width="wrap_content"
                    android:layout_height="wrap_content"
                     android:textColor="#000000"
                    android:text="Want to move your website on the front page on Goggle for that We have the best SEO team which can help you to achieve your desire. We give guaranteed improvement in your website ranking. So that you can reach to new customers" />

            </LinearLayout>

            <TextView
                android:id="@+id/layouttext3"
                android:layout_width="wrap_content"
                android:layout_height="wrap_content"
                android:text="Android"
                android:textSize="20sp"
                 android:textColor="#000000"
                android:paddingTop="20dp"
                />

            <LinearLayout
                android:id="@+id/layout3"
                android:layout_width="match_parent"
                android:layout_height="wrap_content"
                android:orientation="vertical" >

                <TextView
                    android:id="@+id/textView4"
                    android:layout_width="wrap_content"
                    android:layout_height="wrap_content"
                     android:textColor="#000000"
                    android:text="Make presence on Google Play Store. Android apps is a new way to reach and promote your services to the world and we have a lot of experience in doing that.  We Develop and also publish the Android application on customer requirement.  " />

            </LinearLayout>

            <TextView
                android:id="@+id/layouttext4"
                android:layout_width="wrap_content"
                android:layout_height="wrap_content"
                android:text="Web Designing and Development"
                android:textSize="20sp"
                 android:textColor="#000000"
                android:paddingTop="20dp"
                />

            <LinearLayout
                android:id="@+id/layout4"
                android:layout_width="match_parent"
                android:layout_height="wrap_content"
                android:orientation="vertical" >

                <TextView
                    android:id="@+id/textView6"
                    android:layout_width="wrap_content"
                    android:layout_height="wrap_content"
                     android:textColor="#000000"
                    android:text="We have designed high quality websites for small medium and global businesses. As we are know that every business in the world needs a website, We offer web services at a very reasonable price." />

            </LinearLayout>

            <TextView
                android:id="@+id/layouttext5"
                android:layout_width="wrap_content"
                android:layout_height="wrap_content"
                android:text="Achievements"
                android:textSize="20sp"
                 android:textColor="#000000"
                android:paddingTop="20dp"
                  />

            <LinearLayout
                android:id="@+id/layout5"
                android:layout_width="match_parent"
                android:layout_height="wrap_content"
                android:orientation="vertical" >

                <TextView
                    android:id="@+id/textView8"
                    android:layout_width="wrap_content"
                    android:layout_height="wrap_content"
                     android:textColor="#000000"
                    android:text="We have done many projects in SEO Android and in Web Development. We have enabled all the links so that you can examine our work." />

            </LinearLayout>

            <TextView
                android:id="@+id/layouttext6"
                android:layout_width="wrap_content"
                android:layout_height="wrap_content"
                 android:textColor="#000000"
                android:text="History"
                 
                 android:paddingTop="20dp"
                 android:textSize="20sp"  />

            <LinearLayout
                android:id="@+id/layout6"
                android:layout_width="match_parent"
                android:layout_height="wrap_content"
                android:orientation="vertical" >

                <TextView
                    android:id="@+id/textView10"
                    android:layout_width="wrap_content"
                    android:layout_height="wrap_content"
                     android:textColor="#000000"
                    android:text="IT Developers was started by couple of ambitious persons. They were very passionate about there work which keeps on increasing day by day and now IT developers Delhi is one of the leading company in IT field" />

            </LinearLayout>

            <TextView
                android:id="@+id/layouttext7"
                android:layout_width="wrap_content"
                android:layout_height="wrap_content"
                  android:textSize="20sp"
                   android:textColor="#000000"
                android:paddingTop="20dp"
                 
                android:text="Email" />

            <LinearLayout
                android:id="@+id/layout7"
                android:layout_width="match_parent"
                android:layout_height="wrap_content"
                android:orientation="vertical" >

                <TextView
                    android:id="@+id/test"
                    android:layout_width="wrap_content"
                    android:layout_height="wrap_content"
                     android:textColor="#000000"
                    android:text="itdevelopersdelhi@gmail.com" />

            </LinearLayout>

            <TextView
                android:id="@+id/layouttext8"
                android:layout_width="wrap_content"
                android:layout_height="wrap_content"
                  android:textSize="20sp"
                android:paddingTop="20dp"
                 android:textColor="#000000"                 
                android:text="Telephone" />

            <LinearLayout
                android:id="@+id/layout8"
                android:layout_width="match_parent"
                android:layout_height="wrap_content"
                android:orientation="vertical" >

                <TextView
                    android:id="@+id/textView7"
                    android:layout_width="wrap_content"
                    android:layout_height="wrap_content"
                     android:textColor="#000000"
                    android:text="M: +91 8802489781" />

            </LinearLayout>


        </LinearLayout>
    </ScrollView>

</LinearLayout>


Soucre code:-

First Step:- Initialize the layout and textview and set the visibility of the layout GONE

t1=(TextView)findViewById(R.id.layouttext1);
        t2=(TextView)findViewById(R.id.layouttext2);
        t3=(TextView)findViewById(R.id.layouttext3);
        t4=(TextView)findViewById(R.id.layouttext4);
        t5=(TextView)findViewById(R.id.layouttext5);
        t6=(TextView)findViewById(R.id.layouttext6);
        t7=(TextView)findViewById(R.id.layouttext7);
        t8=(TextView)findViewById(R.id.layouttext8);


        l1=(LinearLayout)findViewById(R.id.layout1);
        l2=(LinearLayout)findViewById(R.id.layout2);
        l3=(LinearLayout)findViewById(R.id.layout3);
        l4=(LinearLayout)findViewById(R.id.layout4);
        l5=(LinearLayout)findViewById(R.id.layout5);
        l6=(LinearLayout)findViewById(R.id.layout6);
        l7=(LinearLayout)findViewById(R.id.layout7);
        l8=(LinearLayout)findViewById(R.id.layout8);


        l1.setVisibility(View.GONE);
        l2.setVisibility(View.GONE);
        l3.setVisibility(View.GONE);
        l4.setVisibility(View.GONE);
        l5.setVisibility(View.GONE);
        l6.setVisibility(View.GONE);
        l7.setVisibility(View.GONE);
        l8.setVisibility(View.GONE);
          

Second Step:- set the onclick listener on each of the textview which contain heading
                     like this. and implement a small logic like i have done to make it a accordion.


        t1.setOnClickListener(new OnClickListener() {
          
            @Override
            public void onClick(View arg0) {
                // TODO Auto-generated method stub
                if(z[0]==1){
                    l1.setVisibility(View.GONE);
                    z[0]=0;
                }
                else {
                    l1.setVisibility(View.VISIBLE);
                    l2.setVisibility(View.GONE);
                    l3.setVisibility(View.GONE);
                    l4.setVisibility(View.GONE);
                    l5.setVisibility(View.GONE);
                    l6.setVisibility(View.GONE);
                    l7.setVisibility(View.GONE);
                    l8.setVisibility(View.GONE);
                  
                  
                    z[0]=1;
                }
              
            }
        });

Snapshots:-


 Click Here To Download The Project:-

Friday, 13 December 2013

how to load a url in webview with ProgressDialog in android

This Blog describe the android tutorials which contain android code on different widgets, updates of android market, download project option. it is created and managed by a Android apps developer Specialist who works in www.itdevelopersdelhi.in

In this tutorial i am going to describe how to load a URL in web view in android with ProgressDialog in this the web page will be loaded when the background loading is completed and progress dialog will be get disappear.

Source code :-

import android.os.Bundle;
import android.app.Activity;
import android.app.ProgressDialog;
import android.webkit.WebView;
import android.webkit.WebViewClient;

public class MainActivity extends Activity {
   
    WebView myWebView;
    ProgressDialog mProgressDialog;
    String myAddr = "http://itdevelopersdelhi.in/";
   
    @Override
    protected void onCreate(Bundle savedInstanceState) {
        super.onCreate(savedInstanceState);
        setContentView(R.layout.activity_main);
       
        myWebView=(WebView)findViewById(R.id.webView1);
        mProgressDialog = new ProgressDialog(MainActivity.this);
       
        mProgressDialog.setTitle("Android Tutorial");
        mProgressDialog.setCanceledOnTouchOutside(false);
        mProgressDialog.show();
       
        myWebView.getSettings().setUseWideViewPort(true);
        myWebView.getSettings().setLoadWithOverviewMode(true);
        myWebView.getSettings().setJavaScriptEnabled(true);
        myWebView.loadUrl(myAddr);
        myWebView.setWebViewClient(new WebViewClient(){
            @Override
            public void onPageFinished(WebView view, String url) {
                // TODO Auto-generated method stub
                super.onPageFinished(view, url);
                if (mProgressDialog.isShowing()) {
                    mProgressDialog.dismiss();
                }
            }
        });
    }
}


XML Code :-

<RelativeLayout xmlns:android="http://schemas.android.com/apk/res/android"
    xmlns:tools="http://schemas.android.com/tools"
    android:layout_width="match_parent"
    android:layout_height="match_parent"
    tools:context=".MainActivity" >

    <WebView
        android:id="@+id/webView1"
        android:layout_width="match_parent"
        android:layout_height="match_parent"
        android:layout_centerHorizontal="true"
        android:layout_centerVertical="true" />

</RelativeLayout>

Snapshot :-


Thursday, 12 December 2013

How to open url in WebView in android


In this tutorial (post) i am going to explain how we can open an website or url in a web view pragmatically. Usually we open an url by using intent which forces us to open the url in android browser. But if we are making an an application and we want to open an link inside over app. For that this post helps you to achieve that.

First Step:- create the objects of webview and a string which contain the url.

final static String myAddr = "http://itdevelopersdelhi.in";

Second Step:- create the oncreate function and set following properties of the webview.

myWebView = new WebView(this);
myWebView.getSettings().setUseWideViewPort(true);
myWebView.getSettings().setLoadWithOverviewMode(true);
myWebView.getSettings().setJavaScriptEnabled(true);               
myWebView.setWebViewClient(new WebViewClient());
myWebView.loadUrl(myAddr);

Third Step:- Set the webview as the contentView

setContentView(myWebView);

Source Code of the Project :-

import android.os.Bundle;
import android.app.Activity;
import android.webkit.WebView;
import android.webkit.WebViewClient;

public class MainActivity extends Activity {
   
    WebView myWebView;
    //final static String myAddr = "http://android-er.blogspot.com";
    final static String myAddr = "http://itdevelopersdelhi.in/";
   
    @Override
    protected void onCreate(Bundle savedInstanceState) {
        super.onCreate(savedInstanceState);
        //setContentView(R.layout.activity_main);
        myWebView = new WebView(this);
       
        myWebView.getSettings().setUseWideViewPort(true);
        myWebView.getSettings().setLoadWithOverviewMode(true);
       
        myWebView.getSettings().setJavaScriptEnabled(true);               
        myWebView.setWebViewClient(new WebViewClient());
       
        myWebView.loadUrl(myAddr);
        setContentView(myWebView);
       
    }
   

}

Xml File :-

        No need to make any XML file to run the above code

Manifest file updation :-

       Add the internet permission in the manifest.

Snapshot:-


Click Here To Download the project:-


Wednesday, 11 December 2013

Android Application Developer: Android Apps Developer

Android Application Developer: Android Apps Developer: Rishi Sangal is highly experienced Android Mobile Apps Developer professional. He is currently working as Android Apps Developer...

Tuesday, 10 December 2013

How To Overlap Two Layouts in Android.


Today I am going To Discribe You How we can overlap or place one layout over another. and open the multiple html pages on a single XML file.

Part One

First Step :- Open an xml file and take frame layout insert a web view and the code has shown below.

<FrameLayout xmlns:android="http://schemas.android.com/apk/res/android"
    xmlns:tools="http://schemas.android.com/tools"
    android:id="@+id/FrameLayout1"
    android:layout_width="match_parent"
    android:layout_height="match_parent"
    tools:context=".MainActivity" >

    <WebView
        android:id="@+id/webView1"
        android:layout_width="match_parent"
        android:layout_height="match_parent" />

</FrameLayout>

Second Step :- Now take a Relative layout and and but two Buttons in that . The final XML is shown below.

<FrameLayout xmlns:android="http://schemas.android.com/apk/res/android"
    xmlns:tools="http://schemas.android.com/tools"
    android:id="@+id/FrameLayout1"
    android:layout_width="match_parent"
    android:layout_height="match_parent"
    tools:context=".MainActivity" >

    <WebView
        android:id="@+id/webView1"
        android:layout_width="match_parent"
        android:layout_height="match_parent" />

    <RelativeLayout
        android:layout_width="match_parent"
        android:layout_height="match_parent" >

        <Button
            android:id="@+id/button2"
            android:layout_width="wrap_content"
            android:layout_height="wrap_content"
            android:layout_alignParentBottom="true"
            android:layout_alignParentRight="true"
            android:background="@drawable/next" />

        <Button
            android:id="@+id/button1"
            android:layout_width="wrap_content"
            android:layout_height="wrap_content"
            android:layout_alignParentBottom="true"
            android:layout_alignParentLeft="true"
            android:background="@drawable/previous" />

    </RelativeLayout>

</FrameLayout>

Part Two:- 

First Step :-Now Comes to The second part which is coding. Create an activity and Create the following Objects 

Button prev,next;
int z=0;
WebView w1;

Second Step :- Create a onCreate Function and put initialize the following variables.

prev=(Button)findViewById(R.id.button1);
next=(Button)findViewById(R.id.button2);
w1=(WebView)findViewById(R.id.webView1);

Third Step :- We have taken a z variable to keep a track on the html page's which we are going to open in over webview. Now Load the First page in the web view which will be loaded automatically when the app will be open.
w1.loadUrl("file:///android_asset/it/htmlPage.html");

Note:- Make sure you have the HTML files in your asserts folder.

Fourth Step:- Now implement the onclick listener on the button and put the if else condition (See below to Take an Idea).


prev.setOnClickListener(new OnClickListener() {
          
            @Override
            public void onClick(View v) {
                // TODO Auto-generated method stub
                if (z>0) {
                    --z;
                }
                              
                if (z==0){
                    w1.loadUrl("file:///android_asset/it/htmlPage.html");
                }
                else if (z==1) {
                    w1.loadUrl("file:///android_asset/it/ourServices.html");
                }
            }
        });
        next.setOnClickListener(new OnClickListener() {
          
            @Override
            public void onClick(View v) {
                // TODO Auto-generated method stub
                if(z<2){
                    ++z;
                }
              
                if (z==1){
                    w1.loadUrl("file:///android_asset/it/ourServices.html");
                }
                else if (z==2) {
                    w1.loadUrl("file:///android_asset/it/contact.html");
                }
            }
        });    


FULL CODE :-

public class MainActivity extends Activity{

    Button prev,next;
    int z=0;
    WebView w1;
   
    @Override
    protected void onCreate(Bundle savedInstanceState) {
        // TODO Auto-generated method stub
        super.onCreate(savedInstanceState);
        setContentView(R.layout.activity_main);
       
        prev=(Button)findViewById(R.id.button1);
        next=(Button)findViewById(R.id.button2);
        w1=(WebView)findViewById(R.id.webView1);
       
        w1.loadUrl("file:///android_asset/it/htmlPage.html");
       
        prev.setOnClickListener(new OnClickListener() {
           
            @Override
            public void onClick(View v) {
                // TODO Auto-generated method stub
                if (z>0) {
                    --z;
                }
                               
                if (z==0){
                    w1.loadUrl("file:///android_asset/it/htmlPage.html");
                }
                else if (z==1) {
                    w1.loadUrl("file:///android_asset/it/ourServices.html");
                }
            }
        });
        next.setOnClickListener(new OnClickListener() {
           
            @Override
            public void onClick(View v) {
                // TODO Auto-generated method stub
                if(z<2){
                    ++z;
                }
               
                if (z==1){
                    w1.loadUrl("file:///android_asset/it/ourServices.html");
                }
                else if (z==2) {
                    w1.loadUrl("file:///android_asset/it/contact.html");
                }
            }
        });   
    }
}

Snapshots:-


How to open a website in android.


 In This tutorial I am going to display how you can open a website in android by using intent. This is a simplest way to open a website. you just have to put the code on a button or any other widget and implement a on click listener on it and the rest of the work will be done in the browser.

import android.app.Activity;
import android.content.Intent;
import android.net.Uri;
import android.os.Bundle;
import android.view.View;
import android.view.View.OnClickListener;
import android.widget.Button;

public class MainActivity extends Activity{

    Button visit;
   
    @Override
    protected void onCreate(Bundle savedInstanceState) {
        // TODO Auto-generated method stub
        super.onCreate(savedInstanceState);
        setContentView(R.layout.activity_main);
       
        visit=(Button)findViewById(R.id.visit);
       
        visit.setOnClickListener(new OnClickListener() {
           
            @Override
            public void onClick(View v) {
                // TODO Auto-generated method stub
                Uri uri=Uri.parse("http://itdevelopersdelhi.in/");
                Intent k=new Intent(Intent.ACTION_VIEW,uri);
                startActivity(k);
            }
        });
       
    }
}


Snapshots:- 


Download The Project:-


Wednesday, 20 November 2013

How to Open a HTML Page in Web View in android

This Tutorial helps you to understand how we can load or open an html page in webview in android. We can save over lot of time by saving the creating a HTML page because in creating a layout page we have to put lot of efforts.

To load a HTML page in WebView we have to paste the pages in assets folder. then follow these steps.

First Step:-

Take a Web View in your activity_main.xml and set the width and height of the webview as fill parent.

Second Step:-

Put the following code in the Main Activity of your assets folder.


Source Code:-
import android.os.Bundle;
import android.app.Activity;
import android.webkit.WebView;

public class MainActivity extends Activity {

    @Override
    protected void onCreate(Bundle savedInstanceState) {
        super.onCreate(savedInstanceState);
        setContentView(R.layout.activity_main);
       
        WebView w1=(WebView)findViewById(R.id.webView);
        w1.loadUrl("file:///android_asset/it/htmlPage.html");
       
    }
}

Download the project

Monday, 11 November 2013

Android Apps Developer


Rishi Sangal is highly experienced Android Mobile Apps Developer professional. He is currently working as Android Apps Developer in Advance Infotech. He also works as a freelancer. He have Excellent Communication skills, comfortable in interacting with all levels of the agencies and clients. Proficient in prioritizing and completing tasks in a timely manner, yet flexible to multitask when necessary.

By developing around 20 Application during last 1 year, He has a good hand on Android high level concepts like JSON, Animation etc. He gets his reputation with his work ethics and skills. Trustworthy,quality, on-time, affordable quote for every contract leads him long-term relationship with clients. He is willing to assist someone who is new to Android scene and ready to walk you through to the end.